Category: Beauty

Influenster x Maybelline

A makeup post? Can you believe it?

I know, it’s been a while. The two main reasons… 1. I haven’t been wearing much makeup lately so there hasn’t been a need for me to post and 2. I’m really forgetful these days and when I do get new goodies, it completely skips my mind to post! For that, I am sorry.


Let’s hop to it shall we…

If you follow me on social media (if you’re not, what are you waiting for?! helloooo Twitter/Facebook) anywho… I shared these products long before this review so you had an early preview if you follow along.

What did I share…


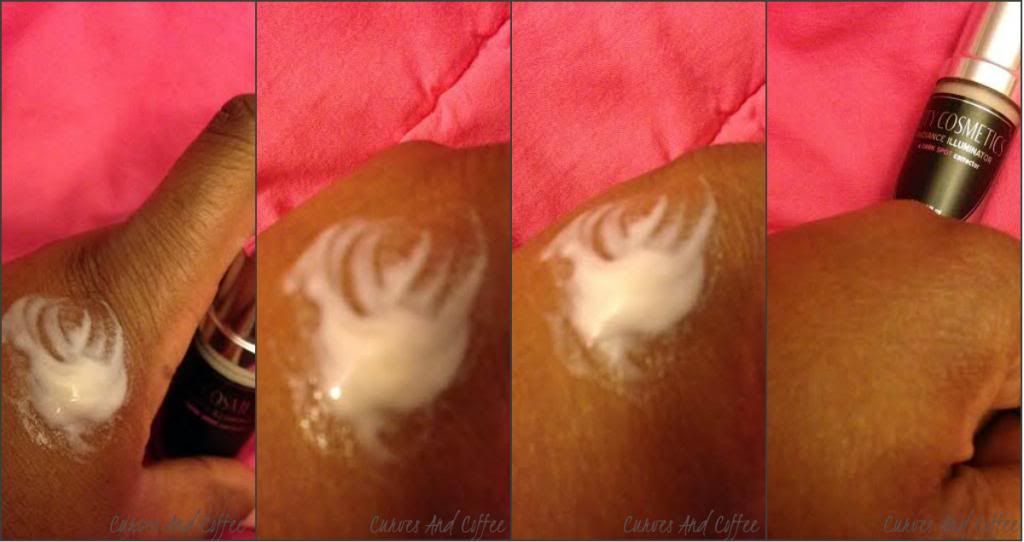
Influenster and Maybelline hooked us up with two new highlighters (yes, TWO!)

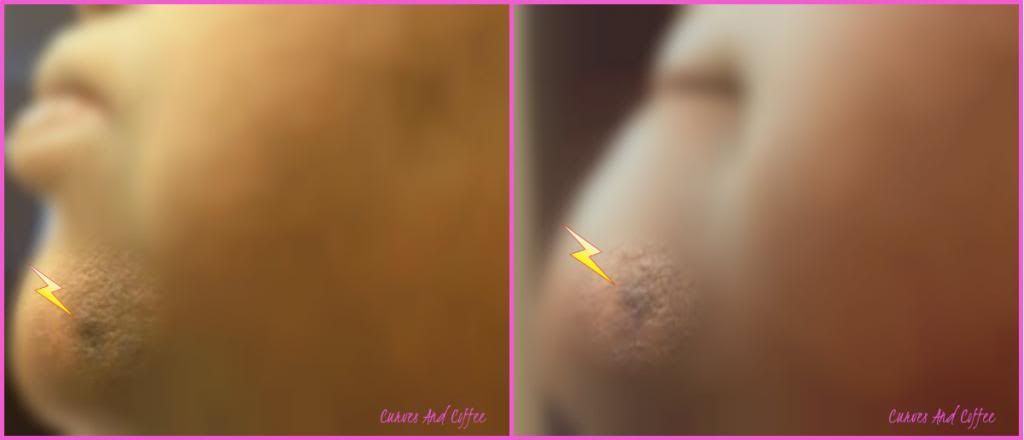
I’ve tested both of them on my face over a regular light foundation and I really only like the white one. Maybelline Master Holographic wears light enough to be worn for any occasion but catches the light enough to be seen. It can be layered to produce an even brighter highlight if you like. The tan/gold/bronze color Maybelline Master Chrome doesn’t wear well for my skin tone. It could be that I have more red undertones (thanks sometimes bothersome rosacea) which makes it look as if my skin is just oddly colored or dry.


Check out this quick video of both swatched on my lower arm. I’m no YouTube guru but I tried my best LOL! I even added a little music, well it’s a 20second video so it’s barely music (heads up if your speakers or headphones are on)

I lightly used the powder then layered 2-3 coats simply using a finger. It’s super soft and little goes a long way especially if you aren’t doing a full coverage face.


Hope you enjoyed!


Disclaimer mumbo jumbo: I was given this for free by Influenster & Maybelline. I was NOT told to give a review or post any feedback of the item. This was on my own free will 😉

Endless Summer VoxBox from Influenster

Hey, I got an Influenster VoxBox! Feels like forever since I’ve had the pleasure of getting such goodies.


And goodies they were! See more of what’s included…


maxfactor

Max Factor

High Precision Liquid Eyeliner + Masterpiece Max Mascara.

OK, this eyeliner tip is absolute genius! I’ve used countless liquid liners over the years but none like this! The shape allows you to get both a thick line AND a thin line just by simply turning the liner. There’s no hard work…just simply turn the liner in your hand, it’s all about how you hold it to create the perfect line you want! Downside to this great tip….it isn’t soft at all. It feels like a rough tip marker. I would love for this to go on smoother.

As for the mascara…it did show up as promised “four times more volume on natural lashes” so that’s a plus. It didn’t clump either…double plus! All the pics I took didn’t show how happy I was with using both of these which is a bummer but overall, I’m glad to have tried both.


numitea

Numi Tea

Organic Turmeric, Jasmine Green, and Pu-erh

Yes, I love me some coffee but I DO drink lots of tea as well. To be perfectly honest, I’ve only tried the the caffeine free Jasmine Green Tea…definitely floral and fragrant. It had a nice taste to it but not my cup of tea (no pun intended.) I’d love to try all the flavors of this brand one day…when I’m back on caffeine again. After visiting their website, I love everything that they’re doing for other communities and their blog with tons of recipes and such. Be sure to check them out.


notyourmothers

Not Your Mother’s Way to Grow Leave-In Conditioner

Love leave-in conditioners! As a part-time curly hair girl, having a good leave-in on the days I go heat free and air dry is a MUST! The smell was nice and light…didn’t feel like it was weighing my already thick strands down. Bottom line, this just might be a new fave for me.


sechenails

Seche Nail Polish

sechenailsinfluenster

This polish was…meh. The application was smooth and I absolutely loved the fast drying top coat but the manicure didn’t last more than a couple of days. I didn’t do anything out of the ordinary during the time I had it on but it certainly started to chip on the SECOND day of wear. By the weekend, I was peeling it off by hand without polish remover. Not sure if I’d actually spend money on this brand of polish in the future. Perhaps, I might get one bottle just to see if it holds up better…I’ll keep you posted.


irontek

Iron Tek Essential Protein

Despite being a “protein shake” (and chocolate…personally not a fan of chocolate, I know, I can hear you all screaming at me now) this shake was quite delicious! I already have shaker bottles so I used that one Saturday morning to mix up and I was good to go! I’d definitely buy these in other flavors like vanilla and please for the love of all things great, make a strawberry flavor!


Sooo yea! Crazy good goodies!

Disclaimer: These items were given to me for free by Influenster for my honest opinion.  

#NYCBigBold Influenster VoxBox

Unboxing a VoxBox!

A rare siting here at Curves And Coffee….me actually uploading a video!

I love being behind the scenes and getting things done so places like Youtube and SnapChat aren’t my go-to social media platforms but today, you’re in luck! See my unboxing of the NYCBigBold Influenster VoxBox…just click play!


As you know, Influenster sends out boxes of goodies for people to review and as the product junkie I am, I qualified for this box! One of the “tasks” required me to film and post an unboxing video so I decided to use this opportunity to test the waters. See the unboxing video above and feel free to send me tips (and encouragement lol) so I can improve my “late-to-the-youtube-party” skills!

Stay tuned for more on this vox box soon!

Valentine’s Day Nail Art: Roses + Pearls

ValentineNails2015

Hey guys!

Today’s nail art is just a quick mani for Valentine’s Day.

I used water slide decals for the first time which is how the roses and garden background came out so well. Can’t even imagine being able to paint those flowers! Eeek! Props to all those talented nail girls and women out there.

The deets…

Colors: Julep- Anisa (deep red) + Natalie (blush) both of which are still available via Julep.com simply search the names and voilà!

I used Essie “Black Licorice” for the accent nails and pearl nail beads which I shaped into small hearts on black for a change of pace and pop of opposite color. Not that my heart is completely black 😉

Have a looksie at this Valentine’s Day nail art…

ValetineNails2015


vdaynail2015


vdaynail2015collage


vdaynails2015


Think I’m getting better at taking pics (YAY!)

Actually, this mani was a practice run with water decals but since I like it so much (flaws and all) I decided to share! Since this was such a quick mani, I wasn’t able to do a DIY tutorial this time around. Don’t worry though, if you guys want, I’ll be sure to post a tutorial post with all the details. Let me know in the comment section below or share a tweet or Facebook comment.

Hope you like!

Friday Faves: Revlon Affordable Lips To Pucker Up To

Now that you guys have been patient…

We’re all caught up!

Ready to see what I’m crushing on?

Of course you are!


After falling in love with COLORBURST Balm Stain by Revlon a year or two ago, I almost jumped at the chance to try out their matte lip colors! Fast-forward to my attention span being as short as a millisecond, I totally forgot about picking one up on my many (many many many) trips to Target until now. Better late than never right? Right! Here’s my fall go-to lip color…a gorgeous deep Merlot-grapey-yummy color.


Revlon ColorBurst Matte Balm in  “Shameless” no.215

IMG_4423

Revlon has an array of colors for their COLORBURST collection. I’ve found that almost all of them work well with any skin tone.

piclipcolor1

The matte trend for lips has its moments of perfection and downfall…have a powwow to see which fits your lips and find that key to unlocking blissfully kissable lips.

I’ve wanted to try this since I first laid eyes on Emma Stone in the ads! Yes, I might be one of those people (the best kind of consumer) who buys something because a celebrity endorses it. Not saying I’ll buy anything just because of that reason but I will buy anything the gorgeous and lovable Emma Stone and Olivia Wilde likes.  Not to mention it’s gorgeous color for under $10! Yes, please!

emmastone2Photo via Revlon

Also on the “Why I love It” list…

Hello! It’s like 6 bucks at any drugstore for starters!  Even though it’s a “matte” lip color, it’s actually very nourishing. It’s not something that will dry your lips out, in fact, you can rub your lips together and the color stays put. The shape is perfect for any purse or wallet. Never a need to use a sharpener…just twist the bottom and voila!

If you’ve purchased any of the Revlon stains or balms….what’s your favorite? Let’s share our goodies!

Mod Mani: Super Easy DIY Nail Art


If you follow Curves And Coffee (me) on Instagram, you’ve already had a sneak peek at what’s in store! If you’re not following me… *In my most Jay-Z & Linkin Park voice* what the hell are you waiting for?!


Taking a trip down memory lane with this weeks mani and nail art.


It’s not totally mod but it definitely has a mod-style feel to it. We’ll just call it “Orange Crushin’ on Summer” Of course I wouldn’t leave you guys without a tutorial! It’s super easy, seriously, suuuuper easy!


What you’ll need: 

scissors, nail polish, tape, nail file.


What I used:


Essie ~ All In One Color Adhesive + Primer ~ $10

Nars ~ Adelita ~ $19

Nars Thakoon ~ Ratin Jot ~ $19

Kiss ~ Paint Set in Gala ~ $6.99

As I was midway through this mani…the Nars ‘Adelita’ polish would take several coats to really POP so I used Essie ~ Fear or Desire ($8.50 seen below) then used the Nars over that for a sparkle POP!


Of course you can use any color(s) or polish you want. I have hundreds of polish bottles and simply riffled through them and picked these colors.


How to do it:


Start with a base coat…ALWAYS start with a base coat when using deeply pigmented polish or else you’ll be left with color stained nails once you remove the polish. I have to admit, sometimes when I’m in a rush and just need a quick coat of color…I skip the base coat.


Once your base coat is dry, it’s time to add striping tape. Don’t be alarmed, striping tape is easy to locate and it’s cheap! I usually purchase mine from eBay or Etsy for less than a dollar or two (if you’re hunting the deals…pennies). You can also find it at your local beauty supply stores or Sally Beauty. It’s rare that I use this tape so a roll will last me more than a year in some cases.


Cut the tape into strips and place them on the edge of the table you’re working on. My chosen work space: my laptop! This makes it easier when it’s time to grab and place. Put the strips where you DON’T WANT polish (sticky side down of course). This is where you get creative! I placed tape in a different position on each nail for a ton of variety…there’s no right or wrong way.


Next step: color time!


Once you’ve applied the color polish of your choice and after the nails have dried a bit, 30-40 minutes for me…you can remove the tape. When you remove the strips, you’ll have open space or empty lines.


This is what happens when you’re in the bed and using your laptop as a table…yes, that’s my beagle Chipper Jones using my “table” as a pillow. Multi-use household here folks!

Anywho…

This is when your third polish choice comes in. I used a pure white color that I got from a Kiss set, you may remember it from this…it lets you paint lines with a long brush (circled in the pic above) basically, a no mess application! No need for extra brushes or dipping or bowls! Use the long brush to fill in those empty spaces that were left after the tape was removed.

The final step: Add a top coat and we’re done!


Finished product:

See! Super super easy!! The final pics didn’t quite come out like I wanted but after taking what seems like a zillion in different light settings…these were the best! Each nail has a different design so this is truly a one-of-a-kind mani! I’m already thinking of a super bright idea using this same technique soon as I locate the 2014 neons!

I’m not a pro…just a curvy girl who likes to have fun with her nails and look pretty!


Queen of Hearts: Cute Valentine’s Day Nail Art

The day for lovers is right around the corner so naturally I have the perfect mani and nail art to show off! By perfect, I totally mean, perfect for the day.

In case you weren’t aware, my favorite color is pink, a particular shade of pink. It can’t be too light and it can’t be too bright…sort of right in the middle. All shades of pink are great but there’s only ONE that gets all of my love! That can become fairly tedious when it comes to finding the perfect shade for my nails and toesies. Whenever I do come across that absolutely amazing pink, I tend to buy a lot of stock!

For this nail art, none other than Essie’s “Mod Squad” would do the trick!

(The specks are actually glitter from a sparkling hand lotion…not too sure why it shows up on camera like I rolled in lint…sorry. Also, after seeing the zoom version….I missed several clean up spots lol ok I’m done critiquing. It’s the perfectionist/OCD in me.)

This cute Valentine’s Day nail art design was super quick and very easy!

Base coat.

Outline hearts.

Fill hearts.

Top coat.

Clean up.

See! Simple!

Give it a try and be sure to send me a pic!

City Cosmetics: Product Review of City Lights Radiance Perfecting Cream (Dark Spot Corrector)


As a beauty junkie and product hoarder, I’m always looking for the “next best thing.” When that best thing happens to be a “dark spot corrector” you have to do your research! The last thing you want is a product filled with things you can’t pronounce that’ll be bad for you. Insert me… Your research guru!


The first task at hand was to find as many of these products were out there (um, a lot!) Second thing…narrow that list down to the exact “target spots” I wanted to reach. Third, read up on those products as best as I could. What I found was interesting and disturbing. Lots of products contain chemicals that are extremely harmful to your health like mercury. Yes, mercury! So once I found products without bad chemicals, I found lots of other reviews on dark spot correctors and went from there!


City Cosmetics seemed to make their way on many of the “good for you” and “best dark spot corrector” lists. Of course if a company and one of their products is making the rounds across the beauty world as being one of the best, it has to be some truth in that, right?


Let’s find out!


I decided to contact City Cosmetics PR department (on my own) to ask for a sample and that’s what I got! City Lights Radiance Perfecting Cream came via mail just a few days later.


Pros of using this cream are obviously the results! There isn’t a big change but definitely a slight lightening effect on my dark spots. The scent of the cream is great. It isn’t sweet or medicine-y just a light fragrance. It has a sparkle effect when it comes out of the bottle but once it’s completely rubbed into your skin it’s almost undetectable!


The directions were to use the product twice a day after washing and drying your face. Apply to target areas and/or as a total face illuminator. According to the reviews, some people saw results within two weeks of using the cream, users saw a change in their skin. Now, me being the non-routine person that I am, of course I missed some mornings and some nights within two weeks of using the cream but I made up for it by continuing to use it. I’m currently on the third week!


This is a before and after…you can see how the dark spot is spreading out and slowly dissipating. I tried to show ONLY the target area and this mark has been annoying me for months and it’s finally starting to disappear! I’m a believer!


Having a darker tone and sensitive skin, any type of acne I get will leave me with a dark mark whether I mess with it or not. The marks I have now are now being treated using the cream. I have taken “selfies” of the progress and I will update you guys as I continue.


The verdict so far…


YES!


What’s That Wednesday: The Lost Files


Ever go through the picture roll in your phone or camera and wonder…
 
What the heck is that?
 
Haha, that’s what I did
 
Here’s what I found…


Besides pics of my nails, Starbucks Discoveries Caramel Macchiato (my fave instant cold coffee), and the pink dress pic…. I have the slightest idea how the rest of these pics happened! My best guess? I was about to take a picture but the button accidentally got pressed before the actual pic. Makes sense to me. I might be a good candidate for the evidence department at the police station because, clearly things are kept very well around here!
 
Anywho…this may become a regular post every Wednesday because I’m sure there’s tons more “oops” pics in both of my phones and digital cam!
 
What do you guys think?


Spooky DIY Halloween Nail Art

Hey there stylish sweets!

First, let me apologize for this post being a day late. I realized I hit “save” instead of publish as I was getting my flu shot Monday. If you’ve ever had one, you also know that once it kicks in, you’re pretty much useless later in the day. I’m here and it’s here now so let’s do it!

Welcome to the end of October, yes the END OF OCTOBER!
I know it’s been a week since you’ve seen me, just had a teeny tiny bit of stress. The previous two weeks were extremely busy on the “life” side of things and all I wanted to do was sleep, eat, and watch tv! Well, that’s what I did! Now I’m back full of energy, rested, and ready to get this show on the road.
First up for this week… MANI MONDAY…uh Tuesday! There’s no better holiday than Halloween to do a crazy over-the-top manicure…the creative possibilities are truly endless! Last year, I did a little bloody nailart that got rave reviews. This year, I wanted to do something way more elaborate…take a look!
Everything was done free-hand and I was a nervous wreck! Seriously, if there was an oops, I’d have to start all over again and you guys know that wasn’t happening LOL!
On the left hand:
Thumb ~ scary jack-o-lantern
Index ~ spider web
Middle ~ scared ghost
Ring ~ bloody mess
Pinky ~ EEK!
On the right hand:
Thumb ~ scary jack-o-lantern
Index ~ spider web
Middle ~ scared ghost
Ring ~ bloody mess
Pinky ~ BOO!
All nails have some sort of “glow in the dark” pattern which is sooo cute! Since I couldn’t figure out how to get the “glow” element to show up last week…..I did a little research. The answer is black light. Who has a random black light laying around? Lol not me. So I’m gonna go out and get one some time this week and hopefully it works! Til then…
Halloween Nail Art 2013 is in the books!