If you follow Curves And Coffee (me) on Instagram, you’ve already had a sneak peek at what’s in store! If you’re not following me… *In my most Jay-Z & Linkin Park voice* what the hell are you waiting for?!
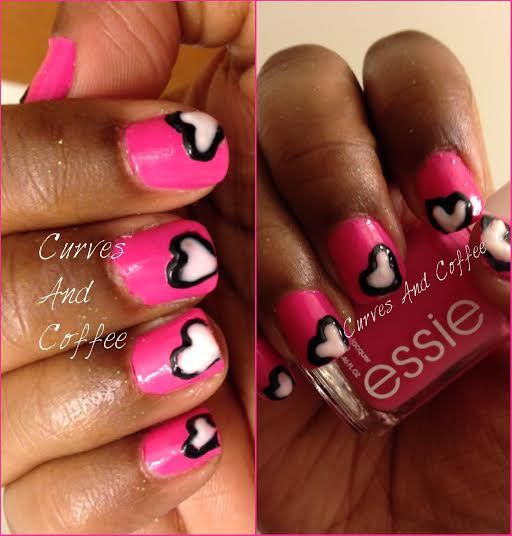
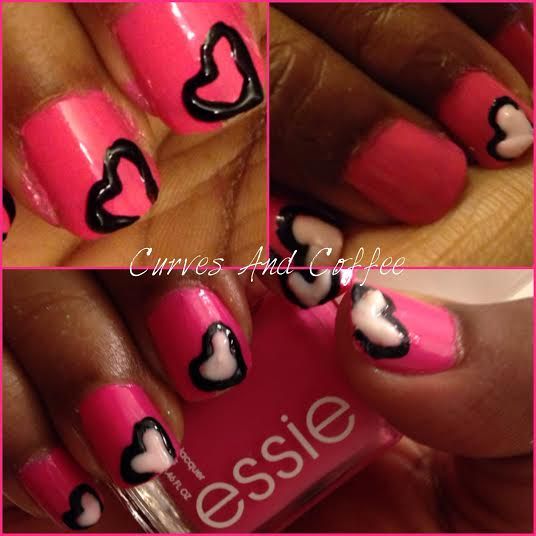
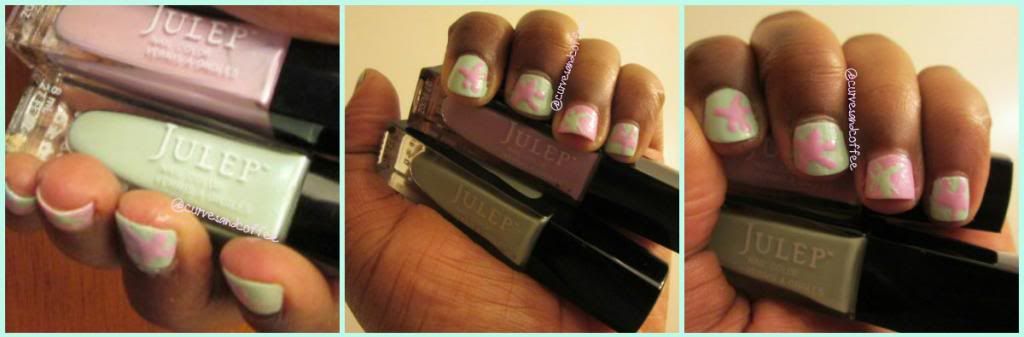
Taking a trip down memory lane with this weeks mani and nail art.
It’s not totally mod but it definitely has a mod-style feel to it. We’ll just call it “Orange Crushin’ on Summer” Of course I wouldn’t leave you guys without a tutorial! It’s super easy, seriously, suuuuper easy!
What you’ll need:
scissors, nail polish, tape, nail file.
What I used:

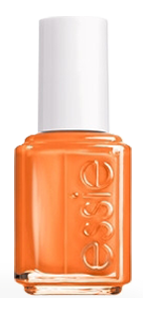
Essie ~ All In One Color Adhesive + Primer ~ $10
Nars ~ Adelita ~ $19
Nars Thakoon ~ Ratin Jot ~ $19
Kiss ~ Paint Set in Gala ~ $6.99
As I was midway through this mani…the Nars ‘Adelita’ polish would take several coats to really POP so I used Essie ~ Fear or Desire ($8.50 seen below) then used the Nars over that for a sparkle POP!
Of course you can use any color(s) or polish you want. I have hundreds of polish bottles and simply riffled through them and picked these colors.
How to do it:
Start with a base coat…ALWAYS start with a base coat when using deeply pigmented polish or else you’ll be left with color stained nails once you remove the polish. I have to admit, sometimes when I’m in a rush and just need a quick coat of color…I skip the base coat.
Once your base coat is dry, it’s time to add striping tape. Don’t be alarmed, striping tape is easy to locate and it’s cheap! I usually purchase mine from eBay or Etsy for less than a dollar or two (if you’re hunting the deals…pennies). You can also find it at your local beauty supply stores or Sally Beauty. It’s rare that I use this tape so a roll will last me more than a year in some cases.
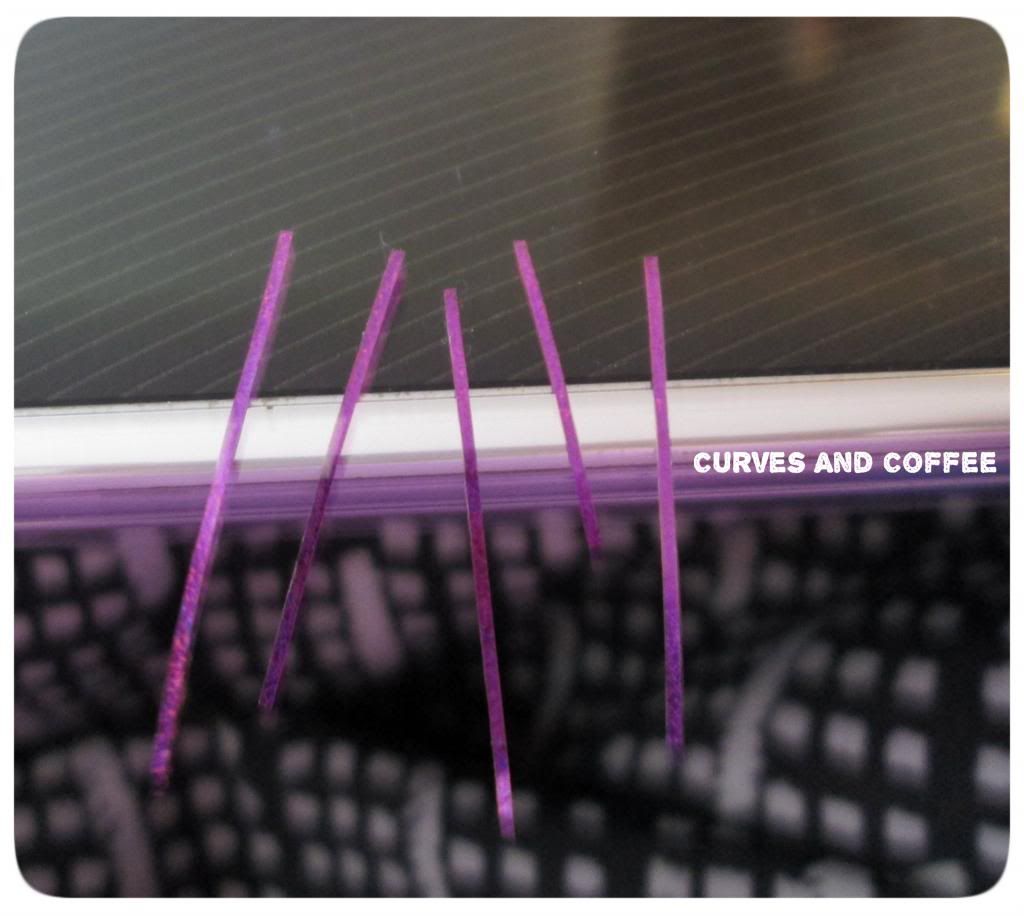
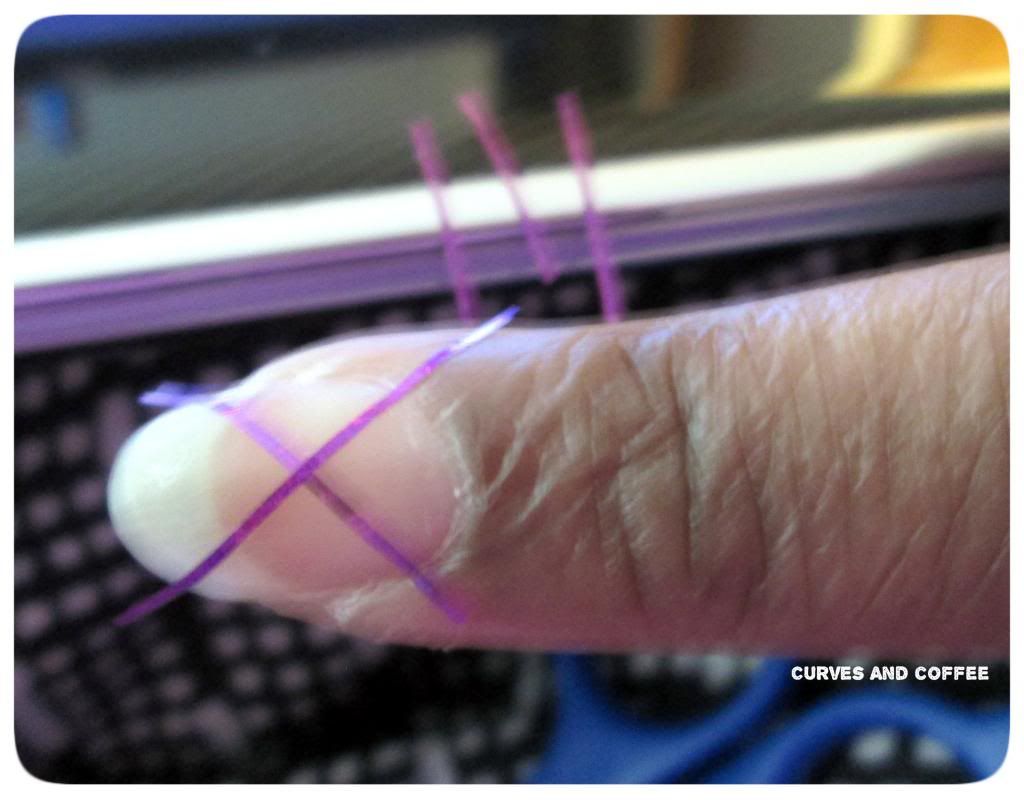
Cut the tape into strips and place them on the edge of the table you’re working on. My chosen work space: my laptop! This makes it easier when it’s time to grab and place. Put the strips where you DON’T WANT polish (sticky side down of course). This is where you get creative! I placed tape in a different position on each nail for a ton of variety…there’s no right or wrong way.
Next step: color time!
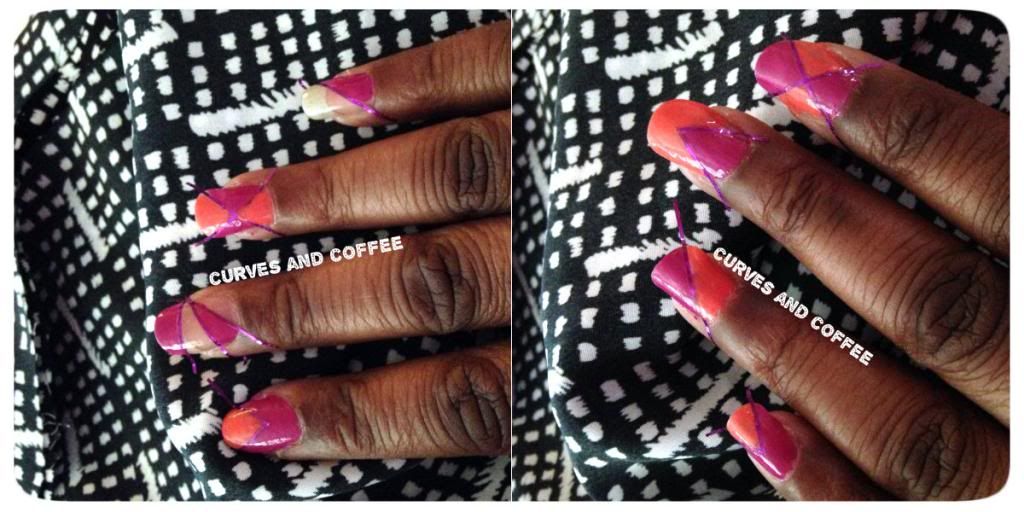
Once you’ve applied the color polish of your choice and after the nails have dried a bit, 30-40 minutes for me…you can remove the tape. When you remove the strips, you’ll have open space or empty lines.

This is what happens when you’re in the bed and using your laptop as a table…yes, that’s my beagle Chipper Jones using my “table” as a pillow. Multi-use household here folks!
Anywho…
This is when your third polish choice comes in. I used a pure white color that I got from a Kiss set, you may remember it from this…it lets you paint lines with a long brush (circled in the pic above) basically, a no mess application! No need for extra brushes or dipping or bowls! Use the long brush to fill in those empty spaces that were left after the tape was removed.
The final step: Add a top coat and we’re done!
Finished product:
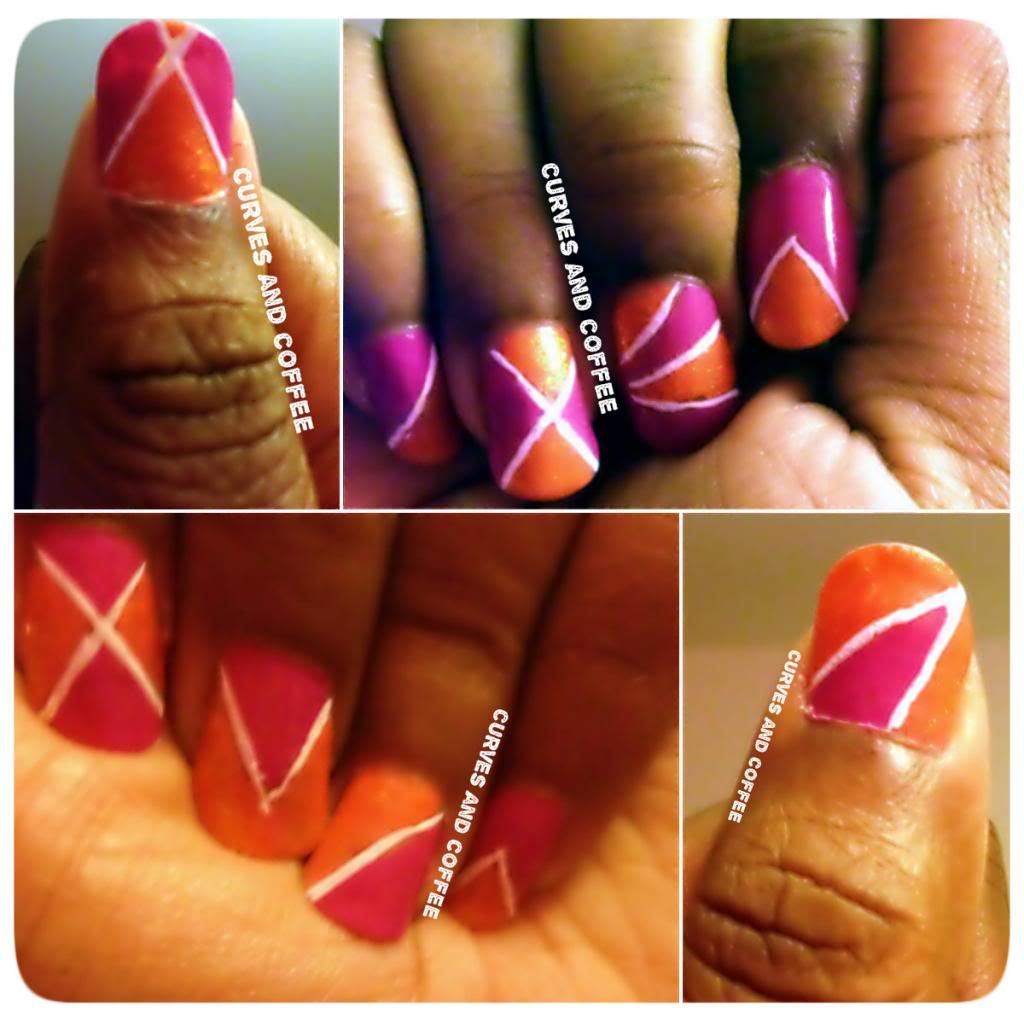
See! Super super easy!! The final pics didn’t quite come out like I wanted but after taking what seems like a zillion in different light settings…these were the best! Each nail has a different design so this is truly a one-of-a-kind mani! I’m already thinking of a super bright idea using this same technique soon as I locate the 2014 neons!
I’m not a pro…just a curvy girl who likes to have fun with her nails and look pretty!